Master Batten Light installation with essential techniques! This guide covers professional mounting, wiring, and positioning tips for a perfect finish. Step-by-step instructions ensure flawless results every time.
Key Takeaways
Successful batten light installation hinges on meticulous preparation, correct mounting, strict adherence to electrical safety, and precise positioning. Before commencing, ensure you have verified the structural integrity of the mounting surface, confirmed compatibility between the fixture and your electrical supply, and gathered all necessary tools and hardware specified for the job. Choosing the appropriate mounting method is critical; surface mounting directly to ceilings or walls is common, while pendant mounting requires robust support and careful height consideration. Electrical safety is paramount – always isolate the circuit at the mains before handling any wiring and double-check connections against the manufacturer’s diagram. Achieving uniform illumination depends heavily on accurate fixture alignment and spacing, directly impacting the final aesthetic and functional quality of the lighting. Finally, rigorous testing of all electrical connections and the fixture’s operation is non-negotiable before considering the job complete.
“Never underestimate the importance of verifying circuit isolation before starting electrical work. It’s the fundamental step for personal safety.” – Common Electrical Safety Protocol
| Mounting Method | Primary Use Case & Considerations |
|---|---|
| Direct Surface | Solid ceilings/walls; simplest installation. Ensure surface is flat and secure. |
| Pendant / Suspended | Requires drop rods/cables; critical to verify load capacity of support points. |
| Recessed (Channel) | Integrated into false ceilings; requires precise cutout and adequate void depth. Professional consultation recommended. |
- Tip: Always use the mounting hardware supplied with the fixture or exact equivalents rated for the fixture’s weight. Substandard hardware can lead to fixture detachment.
- Correct wiring termination and secure connections prevent arcing and potential fire hazards. Double-check wire nuts or terminal blocks are tight.
- Initial positioning marks made during planning should be revisited before final fixing to ensure optimal light distribution and alignment. Minor adjustments here significantly improve the final illumination quality. Thorough post-installation testing validates safety and functionality.
Pre-Installation Essentials Checklist
Thorough preparation is fundamental before beginning any batten light installation. A comprehensive checklist ensures safety, efficiency, and a professional outcome. Start by confirming the main power supply is completely isolated at the circuit breaker; use a reliable voltage tester to double-check wires are dead. Assess the installation surface meticulously. Identify ceiling joists or wall studs using a stud finder, as these provide the necessary structural support for secure mounting. Check the surface is level, clean, and free from debris or damage that could affect fixture stability.
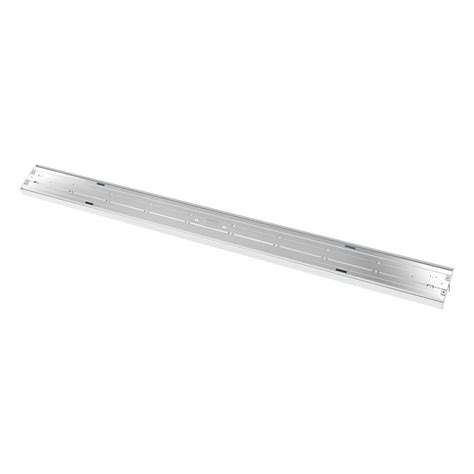
Next, gather all necessary tools and materials specified in the batten light manufacturer’s instructions. This typically includes the fixture itself, mounting brackets, appropriate screws and wall plugs, wire connectors, a screwdriver, wire strippers, a drill with suitable bits, a ladder, and personal protective equipment like safety glasses and gloves. Verify you have the correct type and length of electrical cable for any required extensions or connections, ensuring it matches the circuit’s rating. Carefully review the provided wiring diagram and installation guide specific to your batten light model, noting any special requirements for clearances or mounting hardware. Finally, ensure the work area is clear and adequately lit for safe maneuvering during the installation process. This systematic approach prevents delays and hazards.
Surface Mounting Techniques Explained
Surface mounting offers a versatile solution, particularly suitable for concrete ceilings or situations where recessed installation isn’t feasible. Begin by accurately marking the designated mounting points on the ceiling surface using the Batten Light fixture’s template or measurements. Precision here prevents misalignment later. Drill pilot holes at these marked points using a masonry bit appropriate for your ceiling material. Insert suitable wall plugs if mounting onto concrete or masonry. Position the mounting bracket or plate firmly against the ceiling, aligning it with the pilot holes. Secure it tightly using corrosion-resistant screws, ensuring the bracket sits perfectly flush and level – a spirit level is essential for this step. Take care not to overtighten, which could damage the bracket or ceiling surface. Once secured, the fixture body typically clips or screws directly onto this stable base plate. This method provides a robust foundation, crucial for the longevity and safety of your Batten Light installation. Proper execution at this stage simplifies subsequent wiring and positioning tasks.

Safe Wiring Procedures Step-by-Step
With the fixture secured, attention turns to the critical electrical connections, demanding meticulous adherence to safety protocols. First, always confirm the main circuit breaker is switched off and use a voltage tester to verify power absence at the connection point before touching any wires. Carefully strip approximately 6-7mm of insulation from the ends of both the supply wires and the fixture’s leads using wire strippers, ensuring no copper strands are nicked or frayed. Next, connect matching wires: typically, the black (or brown) supply wire to the fixture’s live wire (often black or brown), the white (or blue) supply wire to the fixture’s neutral wire (often white or blue), and the green or bare copper supply wire to the fixture’s green grounding wire or designated grounding terminal. Utilize appropriately sized wire connectors (wire nuts or Wagos), twisting the wires together clockwise before securing the connector firmly. Ensure no bare copper is exposed outside the connector. Finally, double-check that all connections are tight and secure, gently tugging on each wire. Neatly tuck the connected wires into the electrical box or fixture channel, taking care not to pinch or damage them, before proceeding to secure any fixture covers.
Achieving Perfect Light Positioning
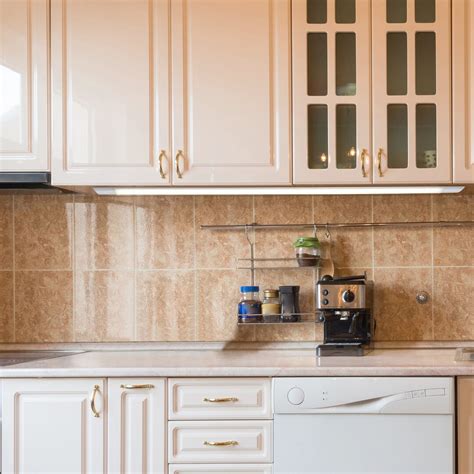
Precise positioning of batten lights fundamentally impacts both the functionality and aesthetics of the illumination. Following safe wiring and secure mounting, the next critical step involves determining the optimal placement for each fixture. Begin by considering the primary purpose of the lighting: is it for general ambient illumination, focused task lighting over a work surface, or accenting specific features? Measure carefully from walls, cabinets, or other architectural elements to ensure consistent spacing. For linear runs, use a laser level to mark a perfectly straight guideline before finalizing fixture locations. Factor in the beam spread of the chosen batten lights; positioning them too far apart can create dark spots, while placing them too close together wastes energy and may cause excessive glare. Always visualize the final layout considering furniture placement and room usage patterns to avoid shadows where light is needed most. Achieving this precision lays the groundwork for the subsequent focus on precise alignment.

Aligning Fixtures for Flawless Results
Precise alignment transforms functional lighting into an architectural feature. Begin by verifying your initial positioning marks using a laser level across the entire installation area, ensuring parallel lines relative to walls or ceilings. For multi-fixture runs, measure equidistant spacing between each unit’s mounting points – typically 1-2 meters apart depending on lumen requirements. Temporary tacking with painter’s tape allows visual verification before permanent fixing. Rotate adjustable battens to eliminate shadow pockets where walls meet ceilings, particularly in corner applications. Crucially, confirm all fixtures share identical orientation angles; even a 5-degree variance creates noticeable visual breaks in illumination continuity. This phase directly impacts light distribution uniformity, preventing hotspots or dark zones across the illuminated surface. Consistent alignment also simplifies subsequent electrical connections during final mounting.
Professional Mounting Hardware Guide
Selecting the correct mounting hardware is fundamental to the secure and lasting installation of your batten light. After determining optimal positioning, the choice of components directly impacts fixture stability and safety. For concrete or masonry surfaces, high-quality concrete screws or specialized anchors, such as wedge anchors, provide reliable load-bearing capacity. When mounting onto plasterboard or suspended ceilings, robust toggle bolts or specialized hollow wall anchors are essential to distribute weight effectively and prevent pull-out. Always verify the weight rating of both the chosen hardware and the batten light fixture itself, ensuring a significant safety margin. Metal mounting brackets, often included but sometimes requiring separate purchase for heavy-duty applications, should exhibit corrosion resistance appropriate for the installation environment. Crucially, match screw types and sizes precisely to the fixture’s mounting points and the selected anchors. Using generic or undersized hardware risks fixture sagging, misalignment, or detachment over time, especially in environments subject to vibration. Proper hardware selection forms the critical physical foundation before proceeding to electrical connections.
Final Testing and Safety Protocols
Following successful installation and positioning, conducting thorough final testing and adhering to strict safety protocols is paramount. Before restoring full power, meticulously double-check all wire connections within the junction box for tightness and correct polarity, ensuring no exposed conductors are present. Utilize a non-contact voltage tester to confirm the circuit is de-energized during this final inspection. Once verified, carefully restore power at the main switch. Observe the Batten Light operation for a full cycle, checking for consistent illumination without flickering, buzzing, or unexpected dimming, which could indicate wiring faults or incompatible dimmer switches.
Crucially, verify the integrity of the earth grounding connection, a fundamental safety measure designed to prevent electric shock hazards. Ensure the fixture feels cool to the touch during operation and that all mounting hardware remains completely secure, with no signs of loosening or movement. Finally, perform a visual sweep of the entire installation area, confirming no tools or debris are left behind and that all access panels or covers are properly reinstated. This disciplined approach to final checks guarantees not only optimal performance but also long-term safety for the lighting fixture and its users.
Conclusion
Successfully completing a Batten Light installation hinges on meticulously applying the techniques outlined throughout this guide. From thorough pre-installation planning and selecting the correct mounting hardware to executing precise surface mounting and safe, compliant wiring procedures, each step contributes significantly to the final outcome. Achieving perfect light positioning and flawless fixture alignment ensures not only the desired aesthetic effect but also optimal illumination distribution. Rigorous final testing confirms operational safety and system integrity. By adhering to these professional practices, you ensure a durable, high-quality installation that delivers reliable, effective lighting performance for the long term, while maintaining the highest standards of electrical safety. This structured approach provides a reliable framework for consistent success.
FAQs
What is the ideal spacing between multiple batten lights?
Spacing depends on ceiling height and desired illumination intensity. A general guideline is to space fixtures approximately 400mm apart for consistent light distribution, but always refer to the manufacturer’s specific recommendations for your model.
Can batten lights be connected directly to existing wiring?
Yes, provided the existing circuit has the correct voltage rating and sufficient capacity for the additional load. Always isolate the circuit at the consumer unit before commencing any electrical work and verify wiring compatibility using a voltage tester.
How do I adjust the light position if it seems off-center after mounting?
Minor adjustments are possible by slightly loosening the mounting screws, repositioning the fixture body within the track slot (if applicable), and retightening. Ensure the power is off during this process. For significant misalignment, remounting the bracket may be necessary.
Why might my newly installed batten light flicker intermittently?
Flickering often indicates a loose connection in the terminal block, an incompatible dimmer switch (if installed), or potential circuit overload. Double-check all wire terminations are secure and ensure the fixture is compatible with your dimming system, if used. Consult an electrician if the issue persists.
What type of mounting hardware is essential for concrete ceilings?
For solid concrete, use high-quality masonry anchors and screws specifically rated for the fixture’s weight. Plastic wall plugs are insufficient; opt for metal expansion anchors or chemical anchors for maximum security, especially for longer or heavier batten fixtures.

